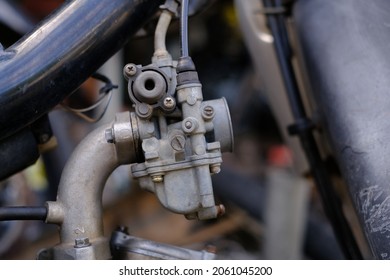
How to Clean a Dirt Bike Carburetor: A Step-by-Step Guide
A clean carburetor is essential for optimal dirt bike performance. Over time, dirt, debris, and old fuel can clog the carburetor’s jets and passages, leading to poor idling, hesitation, and even complete engine failure. Learning how to clean a dirt bike carburetor is a valuable skill that can save you time and money on costly repairs. This comprehensive guide provides a step-by-step process for effectively cleaning your dirt bike’s carburetor and restoring its performance.
Why Cleaning Your Carburetor Matters
Before diving into the cleaning process, it’s crucial to understand why a clean carburetor is so important. The carburetor’s primary function is to mix air and fuel in the correct ratio for combustion. When the carburetor is dirty, this mixture is disrupted, leading to various performance issues:
- Poor Idling: A dirty carburetor can cause the engine to idle roughly or stall completely.
- Hesitation: You may experience hesitation or bogging when accelerating.
- Reduced Power: Clogged jets can restrict fuel flow, resulting in a loss of power.
- Difficult Starting: A dirty carburetor can make it difficult to start the engine, especially in cold weather.
- Poor Fuel Economy: An improperly functioning carburetor can lead to excessive fuel consumption.
By regularly cleaning your dirt bike carburetor, you can prevent these issues and ensure your bike runs smoothly and efficiently.
Tools and Materials You’ll Need
Before you begin, gather the necessary tools and materials:
- Socket Set and Wrenches: For removing the carburetor from the engine.
- Screwdrivers: Both flathead and Phillips head screwdrivers may be needed.
- Carburetor Cleaner: A specialized solvent designed to dissolve varnish and deposits.
- Compressed Air: For blowing out jets and passages.
- Small Brushes: Carburetor cleaning brushes or old toothbrushes are ideal.
- Parts Tray: To keep track of small parts.
- Safety Glasses: To protect your eyes from carburetor cleaner and debris.
- Gloves: To protect your hands from chemicals.
- Clean Rags: For wiping down parts.
- Carburetor Rebuild Kit (Optional): If your carburetor is old or worn, consider replacing the gaskets and O-rings.
Step-by-Step Guide to Cleaning Your Dirt Bike Carburetor
Follow these steps to effectively clean a dirt bike carburetor:
Step 1: Remove the Carburetor
- Turn off the fuel supply: Locate the fuel petcock (usually on the fuel tank) and turn it to the OFF position.
- Disconnect the fuel line: Carefully disconnect the fuel line from the carburetor. Be prepared for some fuel spillage.
- Disconnect the throttle cable: Loosen the throttle cable adjuster and disconnect the cable from the carburetor.
- Disconnect any other cables or hoses: Disconnect any other cables or hoses connected to the carburetor, such as the choke cable.
- Loosen the carburetor clamps: Loosen the clamps that secure the carburetor to the intake manifold and airbox.
- Remove the carburetor: Carefully remove the carburetor from the engine.
Step 2: Disassemble the Carburetor
- Remove the float bowl: Remove the screws holding the float bowl to the carburetor body and carefully remove the bowl. Be careful not to damage the float or other components.
- Remove the float and needle valve: Remove the float pin and carefully remove the float and needle valve.
- Remove the jets: Use a screwdriver to remove the main jet and pilot jet. Make note of their positions for reassembly.
- Remove the idle mixture screw: Carefully remove the idle mixture screw. Count the number of turns it takes to fully seat the screw. This will help you return it to its original setting during reassembly.
- Remove any other removable parts: Remove any other removable parts, such as the choke plunger or throttle slide.
Step 3: Clean the Carburetor Components
- Spray carburetor cleaner: Spray all carburetor components with carburetor cleaner, paying particular attention to the jets and passages.
- Use small brushes: Use small brushes to scrub away any dirt or deposits.
- Blow out passages with compressed air: Use compressed air to blow out all jets and passages. Make sure air flows freely through each passage.
- Soak heavily soiled parts: If some parts are heavily soiled, soak them in carburetor cleaner for a longer period of time.
- Clean the carburetor body: Clean the carburetor body with carburetor cleaner and a clean rag.
Step 4: Reassemble the Carburetor
- Reinstall the jets: Reinstall the main jet and pilot jet in their original positions.
- Reinstall the idle mixture screw: Reinstall the idle mixture screw, turning it in until it is lightly seated, then back it out the same number of turns you counted during disassembly. This is a starting point, and you may need to adjust it later.
- Reinstall the float and needle valve: Reinstall the float and needle valve, making sure the float moves freely.
- Reinstall the float bowl: Reinstall the float bowl and tighten the screws.
- Reinstall any other removable parts: Reinstall any other removable parts, such as the choke plunger or throttle slide.
Step 5: Reinstall the Carburetor
- Reinstall the carburetor: Carefully reinstall the carburetor onto the intake manifold and airbox, securing it with the clamps.
- Reconnect the fuel line: Reconnect the fuel line to the carburetor.
- Reconnect the throttle cable: Reconnect the throttle cable and adjust it as needed.
- Reconnect any other cables or hoses: Reconnect any other cables or hoses connected to the carburetor, such as the choke cable.
- Turn on the fuel supply: Turn the fuel petcock to the ON position.
Tips for Maintaining a Clean Carburetor
To prevent future carburetor problems, follow these tips:
- Use fresh fuel: Old fuel can break down and form deposits in the carburetor. Use fresh fuel and add a fuel stabilizer if you plan to store your bike for an extended period.
- Clean the air filter regularly: A dirty air filter can allow dirt and debris to enter the carburetor. Clean or replace your air filter regularly.
- Use a fuel filter: A fuel filter can help prevent dirt and debris from entering the carburetor.
- Regularly inspect your carburetor: Inspect your carburetor for leaks or damage. Address any issues promptly.
Troubleshooting After Cleaning
Even after carefully cleaning your dirt bike carburetor, you may still experience some issues. Here are some common problems and their solutions:
- Engine won’t start: Check the fuel supply, spark plug, and ignition system. Make sure the carburetor is properly assembled and installed.
- Poor idling: Adjust the idle speed screw and idle mixture screw.
- Hesitation: Check the main jet and pilot jet for clogs. Make sure the accelerator pump is functioning properly (if equipped).
- Poor performance at high RPMs: Check the main jet for clogs. Make sure the fuel filter is clean.
If you’re still experiencing problems after troubleshooting, consult a qualified mechanic.
When to Seek Professional Help
While cleaning your dirt bike carburetor is a manageable task for many riders, there are situations where seeking professional help is recommended:
- You’re not comfortable working on your carburetor: If you’re not confident in your mechanical abilities, it’s best to leave the job to a professional.
- You’ve tried cleaning the carburetor and it’s still not working properly: A professional mechanic has the tools and expertise to diagnose and repair more complex carburetor problems.
- Your carburetor is damaged or worn: If your carburetor is damaged or worn, it may need to be rebuilt or replaced. A professional mechanic can assess the condition of your carburetor and recommend the best course of action.
Cleaning a dirt bike carburetor is a straightforward process that can significantly improve your bike’s performance. By following these steps and taking the necessary precautions, you can keep your carburetor clean and your bike running smoothly for years to come. Remember to use the proper tools, work in a well-ventilated area, and consult a professional if you’re unsure about any aspect of the cleaning process. A well-maintained carburetor translates to a more enjoyable and reliable riding experience. [See also: Dirt Bike Maintenance Checklist] [See also: Common Dirt Bike Problems and Solutions]
