How to Deep Clean a Bike Cassette: A Comprehensive Guide
Maintaining a clean bike cassette is crucial for optimal cycling performance and longevity. A dirty cassette can lead to poor shifting, increased wear on your chain and chainrings, and an overall less enjoyable riding experience. This comprehensive guide will walk you through the process of cleaning a bike cassette, ensuring it remains in top condition. We’ll cover everything from the necessary tools and materials to step-by-step instructions and preventative measures. Keeping your cassette clean not only improves your bike’s performance but also saves you money in the long run by extending the life of your drivetrain. Let’s dive in and learn how to properly clean your cassette.
Why Cleaning Your Bike Cassette Matters
Before we get into the how-to, let’s understand why cleaning a bike cassette is so important. Over time, road grime, dirt, grease, and other contaminants accumulate on the cassette. This buildup creates a sticky paste that hinders smooth shifting. Think of it as trying to run a finely tuned machine with sand in its gears. The result is sluggish performance, skipping gears, and premature wear.
- Improved Shifting Performance: A clean cassette allows for crisp, precise gear changes.
- Extended Drivetrain Life: Dirt acts as an abrasive, wearing down the chain, cassette, and chainrings. Regular cleaning minimizes this wear.
- Reduced Friction: Clean components reduce friction, making your pedaling more efficient.
- Cost Savings: By extending the life of your drivetrain, you’ll save money on replacement parts.
Tools and Materials You’ll Need for Cleaning a Bike Cassette
Having the right tools makes the cleaning a bike cassette process much easier and more effective. Here’s a list of what you’ll need:
- Chain Whip: This tool holds the cassette in place while you remove the lockring.
- Cassette Lockring Removal Tool: This tool fits into the lockring and allows you to unscrew it. Make sure you get the correct type for your cassette (Shimano/SRAM or Campagnolo).
- Adjustable Wrench: To turn the cassette lockring removal tool.
- Degreaser: A bike-specific degreaser is ideal, but you can also use citrus-based degreasers or even dish soap in a pinch.
- Brushes: A variety of brushes, including a stiff-bristled brush, a small brush for tight spaces (like an old toothbrush), and a bottle brush.
- Rags or Shop Towels: For wiping away dirt and degreaser.
- Bucket or Tub: To soak the cassette in degreaser.
- Gloves: To protect your hands from the degreaser.
- Optional: Chain cleaner tool, compressed air.
Step-by-Step Guide to Cleaning a Bike Cassette
Now that you have your tools and materials, let’s get started with cleaning a bike cassette. Follow these steps for a thorough clean:
Step 1: Removing the Cassette
- Remove the Rear Wheel: Take the rear wheel off your bike.
- Secure the Cassette: Place the chain whip on one of the cogs (usually a larger cog) to prevent the cassette from spinning freely.
- Loosen the Lockring: Insert the cassette lockring removal tool into the lockring and attach an adjustable wrench to the tool. Turn the wrench counterclockwise to loosen the lockring. It may require some force.
- Remove the Lockring: Once the lockring is loose, unscrew it completely by hand.
- Remove the Cassette Cogs: Carefully slide the cogs off the freehub body. Pay attention to the order in which they come off, as some cassettes have spacers between the cogs.
Step 2: Cleaning the Cassette Cogs
- Soak the Cogs: Place the cassette cogs in a bucket or tub and spray them with degreaser. Let them soak for 5-10 minutes to loosen the grime.
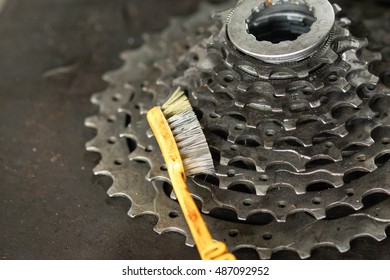
- Scrub the Cogs: Use a stiff-bristled brush to scrub each cog individually, paying attention to the spaces between the teeth. For stubborn grime, use a small brush or an old toothbrush.
- Rinse the Cogs: Rinse the cogs thoroughly with water to remove the degreaser and loosened dirt.
- Dry the Cogs: Dry the cogs with a clean rag or shop towel. You can also use compressed air to speed up the drying process. Make sure they are completely dry before reassembling.
Step 3: Cleaning the Freehub Body (Optional but Recommended)
While you have the cassette off, it’s a good idea to clean the freehub body as well. This will prevent dirt from transferring back to your clean cassette.
- Wipe Down the Freehub Body: Use a clean rag to wipe down the freehub body, removing any dirt or grease.
- Apply a Light Lubricant: Apply a very light lubricant to the freehub body pawls. This will ensure smooth engagement. Be careful not to over-lubricate, as this can attract more dirt.
Step 4: Reassembling the Cassette
- Reinstall the Cogs: Carefully slide the cogs back onto the freehub body in the correct order, making sure to include any spacers.
- Reinstall the Lockring: Screw the lockring back onto the freehub body by hand.
- Tighten the Lockring: Insert the cassette lockring removal tool into the lockring and attach an adjustable wrench to the tool. Tighten the lockring to the manufacturer’s recommended torque specification (usually around 40 Nm).
- Reinstall the Rear Wheel: Put the rear wheel back on your bike.
Alternative Methods for Cleaning a Bike Cassette
While removing the cassette provides the most thorough clean, there are alternative methods for cleaning a bike cassette without removing it from the wheel. These methods are less effective but can be useful for quick maintenance.
Method 1: Using a Chain Cleaner Tool
A chain cleaner tool can also be used to clean the cassette. Simply run the chain through the tool, making sure the brushes clean the cassette cogs as well. This method is best for light cleaning and maintenance.
Method 2: Using Rags and Brushes
You can also clean the cassette with rags and brushes while it’s still on the wheel. Spray degreaser onto a rag and wipe down each cog individually. Use a small brush to clean the spaces between the cogs. This method is time-consuming but can be effective for removing surface dirt.
Tips for Maintaining a Clean Cassette
Preventative maintenance is key to keeping your cassette clean and extending its life. Here are some tips:
- Regular Cleaning: Clean your cassette regularly, especially after riding in wet or dirty conditions.
- Proper Lubrication: Use a good quality chain lubricant to keep your chain running smoothly and prevent dirt from sticking to the cassette. [See also: Best Bike Chain Lubricants]
- Avoid Over-Lubrication: Too much lubricant can attract dirt, so apply it sparingly and wipe off any excess.
- Check for Wear: Regularly check your cassette for wear. If the teeth are worn or damaged, it’s time to replace it.
- Use a Chain Checker: A chain checker can help you determine when your chain needs to be replaced. Replacing your chain before it becomes too worn will help prevent premature wear on your cassette and chainrings.
Troubleshooting Common Issues
Sometimes, even after cleaning a bike cassette, you may still experience shifting problems. Here are some common issues and how to troubleshoot them:
- Skipping Gears: This can be caused by a worn chain, cassette, or chainrings. Check these components for wear and replace them if necessary.
- Poor Shifting: This can be caused by dirty or sticky cables. Clean and lubricate your cables to improve shifting performance.
- Noisy Drivetrain: This can be caused by a dry chain. Apply lubricant to your chain to quiet the drivetrain.
Conclusion
Cleaning a bike cassette is an essential part of bike maintenance. By following the steps outlined in this guide, you can keep your cassette clean, improve your bike’s performance, and extend the life of your drivetrain. Whether you choose to remove the cassette for a thorough clean or use alternative methods for quick maintenance, regular cleaning will help you enjoy a smoother, more efficient ride. Remember to use the right tools and materials, and always prioritize safety. Happy cycling!
