
Sealant Remover: A Comprehensive Guide to Choosing and Using the Right Product
Sealants are essential in various applications, from construction and automotive to plumbing and DIY projects. They create a watertight or airtight barrier, preventing leaks and protecting surfaces. However, removing old or unwanted sealant can be a challenging task. Choosing the right sealant remover is crucial for efficient and damage-free removal. This comprehensive guide will explore different types of sealant removers, their applications, and best practices for using them effectively. Whether you’re dealing with silicone, acrylic, polyurethane, or other types of sealants, understanding the nuances of sealant remover products will save you time and effort.
Understanding Different Types of Sealants
Before diving into sealant removers, it’s essential to understand the different types of sealants you might encounter. Each type has unique properties and requires a specific approach for removal.
- Silicone Sealants: Known for their flexibility and water resistance, silicone sealants are commonly used in bathrooms, kitchens, and windows.
- Acrylic Sealants: These are paintable and often used for filling gaps and cracks in walls and trim.
- Polyurethane Sealants: Offering excellent adhesion and durability, polyurethane sealants are used in construction and automotive applications.
- Polysulfide Sealants: Used in marine applications due to their resistance to chemicals and weathering.
- Hybrid Sealants: Combine the properties of different sealant types, offering versatility and enhanced performance.
Types of Sealant Removers
Various sealant removers are available on the market, each designed for specific types of sealants and applications. Choosing the right one is crucial for effective removal and preventing damage to the underlying surface.
Chemical Sealant Removers
Chemical sealant removers are the most common type, formulated to break down the chemical bonds of the sealant. They are available in liquid, gel, and spray forms.
- Solvent-Based Removers: These removers contain solvents that dissolve the sealant. They are effective for removing silicone, acrylic, and polyurethane sealants.
- Enzyme-Based Removers: These removers use enzymes to break down the sealant. They are a more environmentally friendly option and are often effective on silicone sealants.
- Citrus-Based Removers: Derived from citrus fruits, these removers are a natural alternative to solvent-based products. They are effective on some types of sealants but may require more dwell time.
Mechanical Sealant Removers
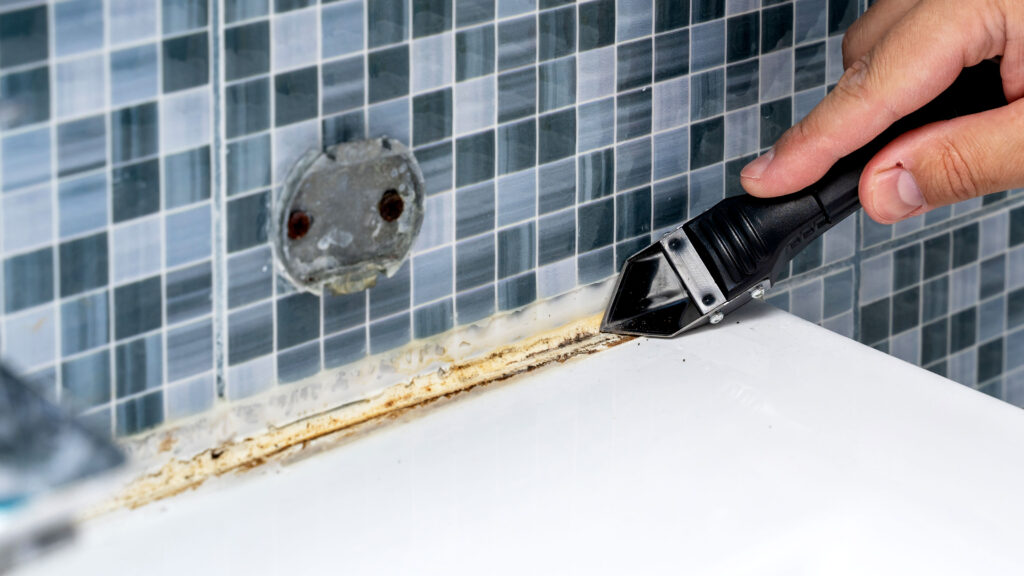
Mechanical sealant removers involve physically removing the sealant using tools such as scrapers, knives, and wire brushes. This method is often used in conjunction with chemical removers to remove stubborn sealant residue.
- Scrapers: Available in various shapes and sizes, scrapers are used to lift and remove the sealant from the surface.
- Knives: Utility knives or specialized sealant removal knives can be used to cut and score the sealant before removal.
- Wire Brushes: Used to remove sealant residue from textured surfaces.
Specialized Sealant Removers
Some sealant removers are specifically formulated for certain types of sealants or applications. These specialized products often contain a blend of chemicals and additives to enhance their effectiveness.
- Silicone Sealant Removers: These removers are designed to penetrate and break down silicone sealants quickly and effectively.
- Acrylic Sealant Removers: Formulated to dissolve acrylic sealants without damaging the underlying surface.
- Gasket Removers: Used to remove stubborn gaskets and sealants from engine parts and other mechanical components.
Choosing the Right Sealant Remover
Selecting the appropriate sealant remover depends on several factors, including the type of sealant, the surface being cleaned, and the desired outcome.
- Identify the Sealant Type: Determine the type of sealant you are trying to remove. This information is usually available on the sealant packaging or by visual inspection.
- Consider the Surface: Evaluate the surface you are cleaning. Some sealant removers can damage or discolor certain materials, such as plastic, paint, or delicate finishes. Always test the remover in an inconspicuous area first.
- Assess the Application: Consider the application and the amount of sealant to be removed. For small areas, a gel or spray remover may be sufficient. For larger areas, a liquid remover or a combination of chemical and mechanical methods may be necessary.
- Read Product Labels: Carefully read the product labels and instructions before use. Pay attention to safety precautions, application guidelines, and recommended dwell times.
- Consider Environmental Factors: If you are concerned about environmental impact, choose an enzyme-based or citrus-based sealant remover. These products are typically biodegradable and less harmful to the environment.
Step-by-Step Guide to Using Sealant Remover
Follow these steps to effectively remove sealant using a sealant remover:
- Prepare the Area: Clean the area around the sealant to remove any loose debris, dirt, or grease. Use a mild detergent and water if necessary.
- Protect Surrounding Surfaces: Cover any surfaces that you don’t want to be exposed to the sealant remover with masking tape or plastic sheeting.
- Apply the Sealant Remover: Apply the sealant remover according to the product instructions. Use a brush, applicator, or spray nozzle to evenly coat the sealant.
- Allow Dwell Time: Allow the sealant remover to dwell for the recommended time. This allows the chemicals or enzymes to break down the sealant. Refer to the product label for specific dwell time recommendations.
- Remove the Sealant: Use a scraper, knife, or wire brush to remove the softened sealant. Apply gentle pressure and work in small sections.
- Clean the Surface: Once the sealant is removed, clean the surface with a clean cloth and a mild detergent. This will remove any remaining residue and prepare the surface for new sealant or other treatments.
- Dispose of Waste: Dispose of the used sealant remover and sealant waste according to local regulations.
Safety Precautions When Using Sealant Removers
Sealant removers can contain hazardous chemicals. It’s essential to take proper safety precautions when using these products.
- Wear Protective Gear: Always wear gloves, safety glasses, and a respirator when using sealant removers. This will protect your skin, eyes, and respiratory system from harmful chemicals.
- Work in a Well-Ventilated Area: Use sealant removers in a well-ventilated area to avoid inhaling harmful fumes. Open windows and doors or use a fan to increase airflow.
- Avoid Contact with Skin and Eyes: Avoid direct contact with skin and eyes. If contact occurs, rinse immediately with plenty of water and seek medical attention.
- Keep Away from Children and Pets: Store sealant removers out of reach of children and pets.
- Follow Product Instructions: Always follow the product instructions and safety guidelines provided by the manufacturer.
Tips for Effective Sealant Removal
Here are some additional tips for effective sealant remover use:
- Test Before Use: Always test the sealant remover in an inconspicuous area before applying it to the entire surface. This will ensure that the remover does not damage or discolor the material.
- Apply Evenly: Apply the sealant remover evenly to ensure that all areas of the sealant are exposed to the chemicals or enzymes.
- Use Multiple Applications: For stubborn sealants, you may need to apply the sealant remover multiple times, allowing sufficient dwell time between applications.
- Use Heat: Applying heat to the sealant can help to soften it and make it easier to remove. Use a heat gun or hairdryer on a low setting to gently heat the sealant before applying the remover.
- Be Patient: Sealant removal can be a time-consuming process. Be patient and avoid rushing, as this can lead to damage to the underlying surface.
Alternatives to Chemical Sealant Removers
While chemical sealant removers are effective, some situations may warrant exploring alternative methods. These methods may be less harsh and more suitable for sensitive surfaces or environmentally conscious individuals.
- Vinegar: White vinegar is a natural solvent that can help to soften some types of sealants. Apply vinegar to the sealant and allow it to soak for several hours before attempting to remove it.
- Baking Soda Paste: A paste made from baking soda and water can be used to scrub away sealant residue. This method is gentle and non-abrasive.
- Steam: Steam can help to soften and loosen sealant, making it easier to remove. Use a steam cleaner or a handheld steamer to apply steam to the sealant.
- Vegetable Oil: Vegetable oil can help to dissolve some types of sealants. Apply oil to the sealant and allow it to soak for several hours before attempting to remove it.
Troubleshooting Common Sealant Removal Problems
Even with the right sealant remover and techniques, you may encounter some common problems. Here’s how to troubleshoot them:
- Sealant is Not Softening: If the sealant is not softening after applying the remover, try increasing the dwell time or applying heat. You may also need to use a stronger sealant remover.
- Remover is Damaging the Surface: If the remover is damaging the surface, stop using it immediately and try a different type of remover or an alternative method.
- Sealant Residue Remains: If sealant residue remains after removal, use a wire brush or a scraper to remove the residue. You may also need to apply more sealant remover.
- Difficulty Removing Sealant from Textured Surfaces: Use a wire brush or a specialized sealant removal tool to remove sealant from textured surfaces.
Conclusion
Choosing the right sealant remover and using it properly is essential for efficient and damage-free sealant removal. By understanding the different types of sealants and removers, following safety precautions, and using the right techniques, you can successfully remove old or unwanted sealant from various surfaces. Remember to always test the remover in an inconspicuous area first and follow the product instructions carefully. With the right approach, you can achieve professional-quality results and restore your surfaces to their original condition. [See also: Removing Silicone Caulk from Tile] [See also: Best Caulk Removers for Bathrooms]
