How to Remove a Sticker from Your Car: A Comprehensive Guide
Stickers on your car can be a fun way to express your personality or show support for a cause. However, the time inevitably comes when you want to remove them. Whether it’s an old parking permit, a faded bumper sticker, or just a design you’ve outgrown, knowing how to remove a sticker from your car without damaging the paint is crucial. This comprehensive guide will walk you through various methods, ensuring a clean and scratch-free removal process.
Understanding the Challenge: Why Sticker Removal Can Be Tricky
Removing stickers from a car isn’t always as simple as peeling them off. The adhesive used in these stickers is designed to withstand weather and time, making them stubbornly cling to the surface. Attempting to simply rip them off can lead to several problems:
- Damaged Paint: Aggressive peeling can lift or scratch the car’s paint, resulting in costly repairs.
- Adhesive Residue: Even if the sticker comes off, it often leaves behind a sticky residue that’s difficult to remove.
- Ghosting: Over time, the area around the sticker may fade due to UV exposure, leaving a noticeable ‘ghost’ image even after the sticker is removed.
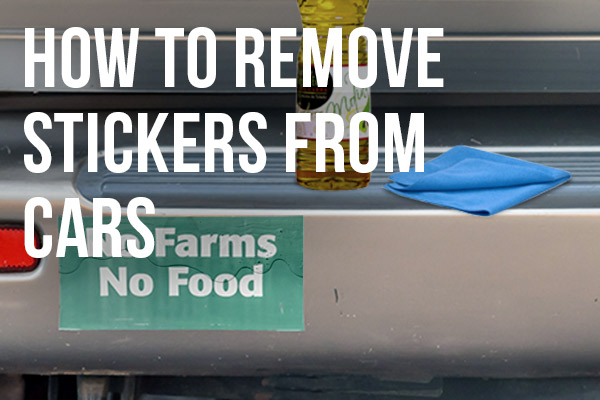
Essential Tools for Sticker Removal
Before you begin, gather the necessary tools. Having the right equipment will make the process smoother and minimize the risk of damage. Here’s a list of recommended items:
- Heat Gun or Hair Dryer: Heat softens the adhesive, making it easier to peel the sticker. A heat gun is more effective but requires extra caution to avoid overheating the paint.
- Plastic Razor Blade or Scraper: These tools are designed to lift the sticker without scratching the paint. Avoid using metal scrapers, as they can easily cause damage.
- Adhesive Remover: Products like Goo Gone, WD-40, or isopropyl alcohol can dissolve the adhesive residue. Always test the product on an inconspicuous area first to ensure it doesn’t damage the paint.
- Microfiber Cloths: These soft cloths are ideal for wiping away residue and polishing the surface.
- Spray Bottle: For applying adhesive remover.
- Gloves: To protect your hands from chemicals and heat.
Method 1: The Heat Gun/Hair Dryer Technique
This method is one of the most effective ways to remove a sticker from your car, especially for older or more stubborn stickers.
- Preparation: Clean the area around the sticker with soap and water to remove any dirt or debris. Dry the area thoroughly.
- Apply Heat: Using a heat gun or hair dryer, apply heat to the sticker for 30-60 seconds. Keep the heat source moving to avoid overheating the paint. The goal is to soften the adhesive, not to burn the sticker.
- Peel and Scrape: Using a plastic razor blade or scraper, gently lift a corner of the sticker. Continue applying heat as you slowly peel the sticker away. Work at a shallow angle to minimize the risk of scratching the paint.
- Remove Residue: Once the sticker is removed, there will likely be some adhesive residue left behind. Apply adhesive remover to a microfiber cloth and gently rub the affected area. Repeat as necessary until the residue is gone.
- Clean and Polish: Finally, clean the area with soap and water and dry it with a clean microfiber cloth. You can also apply a coat of wax or polish to protect the paint.
Method 2: The Adhesive Remover Soak
This method is suitable for newer stickers or those that aren’t too firmly attached. It relies on dissolving the adhesive rather than using heat.
- Preparation: Clean the area around the sticker with soap and water.
- Apply Adhesive Remover: Generously spray the sticker with adhesive remover. Let it soak for 5-10 minutes to allow the solvent to penetrate the adhesive.
- Peel and Scrape: Using a plastic razor blade or scraper, gently lift a corner of the sticker. The adhesive should be softened enough to allow the sticker to peel away easily. If it’s still difficult, apply more adhesive remover and let it soak for a longer period.
- Remove Residue: After removing the sticker, wipe away any remaining residue with a clean microfiber cloth and adhesive remover.
- Clean and Polish: Clean the area with soap and water and dry it with a clean microfiber cloth. Apply wax or polish for added protection.
Method 3: Using Household Items
If you don’t have specialized adhesive removers, you can try using common household items. These methods may not be as effective as dedicated products, but they can be a good alternative in a pinch.
- Isopropyl Alcohol: Soak a cotton ball or microfiber cloth with isopropyl alcohol and apply it to the sticker. Let it sit for a few minutes before attempting to peel the sticker.
- WD-40: WD-40 is a multi-purpose lubricant that can also dissolve adhesive. Spray it on the sticker and let it soak for a few minutes before peeling. Be sure to wash the area thoroughly afterward, as WD-40 can leave a greasy residue.
- Vinegar: White vinegar is a mild acid that can help break down adhesive. Soak a cloth with vinegar and apply it to the sticker. Let it sit for 10-15 minutes before peeling.
Preventing Damage: Key Considerations
When learning how to remove a sticker from your car, prevention is key to avoiding damage:
- Test in an Inconspicuous Area: Before using any adhesive remover or cleaning product, test it on a small, hidden area of the car’s paint to ensure it doesn’t cause discoloration or damage.
- Avoid Metal Scrapers: Metal scrapers can easily scratch the paint. Stick to plastic razor blades or scrapers designed for automotive use.
- Don’t Overheat: If using a heat gun, be careful not to overheat the paint. Keep the heat source moving and avoid holding it in one spot for too long.
- Be Patient: Rushing the process can lead to mistakes and damage. Take your time and work carefully.
- Consider Professional Help: If you’re unsure about any of these methods, or if the sticker is particularly stubborn, consider seeking professional help from a detailer or auto body shop.
Dealing with ‘Ghosting’ or Faded Paint
Even after successfully removing the sticker, you may notice a ‘ghost’ image where the sticker used to be. This is due to the surrounding paint fading over time due to UV exposure. Here’s how to address it:
- Washing and Waxing: Start by thoroughly washing and waxing the area. This can help blend the faded area with the surrounding paint.
- Polishing: If washing and waxing don’t work, you may need to polish the area with a mild abrasive compound. This will remove a thin layer of the faded paint and reveal fresher paint underneath. Be careful not to over-polish, as this can damage the clear coat.
- Professional Detailing: For severe cases of ghosting, consider having the area professionally detailed. A detailer can use specialized equipment and techniques to restore the paint to its original condition.
Choosing the Right Method for Your Sticker
The best method for how to remove a sticker from your car depends on several factors, including the age and type of sticker, the type of adhesive used, and the condition of the car’s paint. Start with the gentlest method first and gradually move to more aggressive techniques if necessary.
For newer stickers, the adhesive remover soak method may be sufficient. For older, more stubborn stickers, the heat gun/hair dryer technique is often more effective. If you’re unsure, start with a small test area to see how the sticker responds to the chosen method.
Long-Term Prevention: Protecting Your Car’s Paint
Once you’ve successfully removed the sticker, consider taking steps to protect your car’s paint and prevent future damage. Regular washing and waxing can help protect the paint from UV exposure and other environmental factors. Applying a clear coat sealant can also provide an extra layer of protection.
Additionally, think carefully before applying any new stickers to your car. Consider using removable vinyl stickers that are designed to be easily removed without leaving residue. [See also: Best Car Cleaning Products] Also, understand that some window tints are delicate and require extra care when removing stickers. [See also: How To Care For Window Tint]
Conclusion: Mastering the Art of Sticker Removal
Knowing how to remove a sticker from your car is a valuable skill for any car owner. By following these methods and taking the necessary precautions, you can safely and effectively remove stickers without damaging your car’s paint. Remember to be patient, use the right tools, and always test products in an inconspicuous area first. With a little care and attention, you can keep your car looking its best.
