
Mastering Pitaya Propagation: A Comprehensive Guide to Making Pitaya Cuttings
Pitaya, also known as dragon fruit, is a vibrant and exotic fruit that’s increasingly popular among gardeners and fruit enthusiasts. Its unique appearance and delicious flavor make it a rewarding plant to grow. One of the most effective ways to expand your pitaya collection is through propagation. Specifically, fazendo mudas de pitaya, or making pitaya cuttings, is a simple and reliable method. This comprehensive guide will walk you through the entire process, from selecting the right cuttings to planting and caring for your new pitaya plants. Whether you’re a seasoned gardener or a beginner, this guide provides the knowledge you need for successful pitaya propagation. The process of fazendo mudas de pitaya is an art and a science, requiring patience and attention to detail.
Understanding Pitaya Propagation
Before diving into the specifics of fazendo mudas de pitaya, it’s crucial to understand the basics of pitaya propagation. Pitaya plants can be propagated through seeds, but this method is less predictable and can take longer for the plant to mature. Cuttings, on the other hand, offer a faster and more reliable way to reproduce the parent plant’s characteristics. This method ensures that you get a plant that produces the same type of fruit as the original.
The success of fazendo mudas de pitaya depends on several factors, including the health of the parent plant, the selection of appropriate cuttings, and the environmental conditions during rooting. By paying close attention to these factors, you can significantly increase your chances of successful propagation.
Selecting the Right Cuttings
The first step in fazendo mudas de pitaya is selecting healthy and mature cuttings from a well-established parent plant. Here’s what to look for:
- Maturity: Choose cuttings that are at least 12-18 inches long. Mature cuttings have a higher chance of successful rooting.
- Health: Select cuttings that are free from diseases, pests, and physical damage. Avoid cuttings with signs of rot or discoloration.
- Nodes: Look for cuttings with multiple nodes (the small bumps where spines or aerial roots emerge). These nodes are where new roots will develop.
- Variety: If you have multiple pitaya varieties, label your cuttings to keep track of them.
Once you’ve selected your cuttings, use a clean, sharp knife or pruning shears to make a clean cut at the base of the cutting. This will help prevent infection and promote healthy root growth.
Preparing the Cuttings for Rooting
After selecting and cutting your pitaya segments, proper preparation is essential for successful rooting. Follow these steps:
- Callusing: Allow the cut end of the cutting to callus over for 1-2 weeks. This helps prevent rot and encourages root formation. Place the cuttings in a dry, shaded area with good air circulation.
- Fungicide Treatment (Optional): To further protect against rot, you can dip the cut end of the cutting in a fungicide solution before callusing.
- Removing Spines: Remove the spines from the lower portion of the cutting that will be buried in the rooting medium. This prevents the spines from rotting and potentially causing infection.
Choosing the Right Rooting Medium
The rooting medium plays a crucial role in the success of fazendo mudas de pitaya. The ideal rooting medium should be well-draining, aerated, and slightly acidic. Here are some options:
- Cactus Mix: A commercial cactus mix is a good option as it provides excellent drainage.
- Perlite and Peat Moss: A mix of equal parts perlite and peat moss offers good drainage and moisture retention.
- Sand and Compost: A mix of sand and compost provides nutrients and drainage.
Avoid using heavy soils that retain too much moisture, as this can lead to root rot. Ensure the rooting medium is moist but not waterlogged before planting the cuttings.
Planting the Cuttings
Once the cuttings have callused and you’ve prepared your rooting medium, it’s time to plant the cuttings. Follow these steps:
- Prepare the Container: Choose a pot that is large enough to accommodate the cutting and provide room for root growth. Make sure the pot has drainage holes.
- Fill the Pot: Fill the pot with your chosen rooting medium, leaving a few inches of space at the top.
- Plant the Cutting: Insert the callused end of the cutting into the rooting medium, burying it about 2-3 inches deep.
- Support the Cutting: Pitaya cuttings can be top-heavy, so provide support with stakes or trellises. This prevents the cutting from falling over and damaging the developing roots.
- Water Gently: Water the cutting gently to moisten the rooting medium. Avoid overwatering, as this can lead to root rot.
Caring for the Cuttings During Rooting
Proper care during the rooting process is essential for successful fazendo mudas de pitaya. Here are some tips:
- Location: Place the cuttings in a warm, bright location with indirect sunlight. Avoid direct sunlight, as this can scorch the cuttings.
- Watering: Keep the rooting medium consistently moist but not waterlogged. Water when the top inch of the soil feels dry.
- Humidity: Pitaya plants thrive in high humidity. You can increase humidity by misting the cuttings regularly or placing them in a humidity dome.
- Temperature: Maintain a temperature between 70-85°F (21-29°C) for optimal rooting.
- Fertilizing: Avoid fertilizing the cuttings until they have developed roots. Once roots have formed, you can start fertilizing with a diluted balanced fertilizer.
[See also: Growing Dragon Fruit in Your Backyard]
Monitoring Root Development
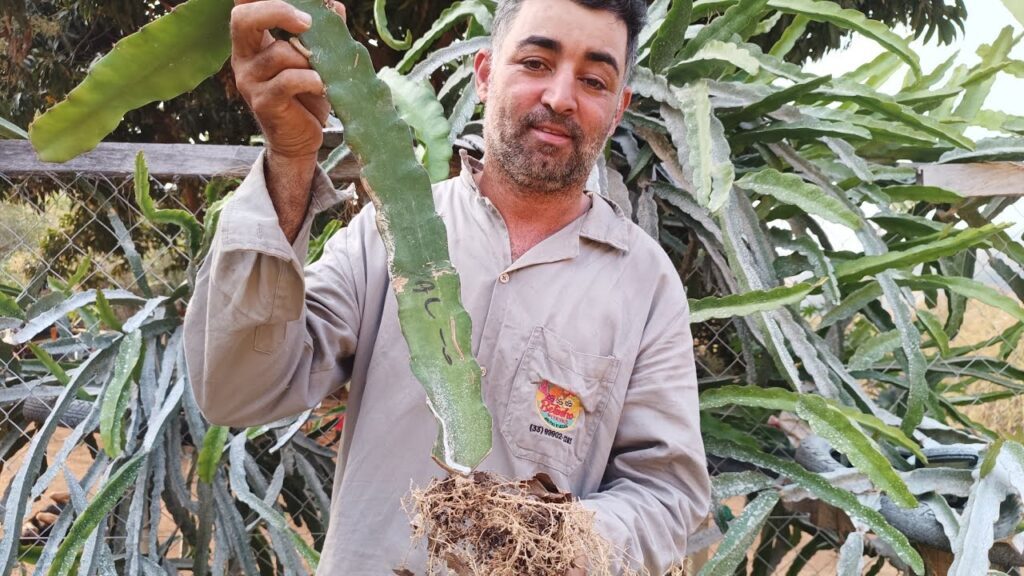
It typically takes 4-8 weeks for pitaya cuttings to develop roots. You can check for root development by gently tugging on the cutting. If you feel resistance, it indicates that roots have formed. You can also carefully remove the cutting from the pot to inspect the root system.
Once the cuttings have developed a healthy root system, they are ready to be transplanted into larger pots or directly into the ground.
Transplanting the Rooted Cuttings
When transplanting rooted pitaya cuttings, choose a well-draining potting mix or amend the soil with compost and sand to improve drainage. Dig a hole that is large enough to accommodate the root ball and gently place the cutting in the hole. Backfill with soil and water thoroughly.
Provide the newly transplanted plants with support, such as a trellis or stake, to encourage vertical growth. Pitaya plants are climbing cacti and need support to thrive.
Ongoing Care for Pitaya Plants
After transplanting, provide your pitaya plants with the following care:
- Sunlight: Pitaya plants need at least 6-8 hours of sunlight per day.
- Watering: Water regularly during the growing season, allowing the soil to dry out slightly between waterings. Reduce watering during the dormant season.
- Fertilizing: Fertilize regularly with a balanced fertilizer during the growing season.
- Pruning: Prune regularly to remove dead or damaged growth and to encourage branching.
- Pest and Disease Control: Monitor your plants for pests and diseases and take appropriate action to control them.
[See also: Common Pitaya Plant Problems and Solutions]
Troubleshooting Common Issues
Even with the best care, you may encounter some issues when fazendo mudas de pitaya. Here are some common problems and solutions:
- Root Rot: Root rot is a common problem caused by overwatering. To prevent root rot, ensure the rooting medium is well-draining and avoid overwatering. If root rot occurs, remove the affected cutting and replant it in fresh, well-draining medium.
- Lack of Root Development: If your cuttings are not developing roots, check the temperature, humidity, and moisture levels. Ensure the cuttings are receiving adequate warmth, humidity, and moisture. You can also try using a rooting hormone to stimulate root growth.
- Pest Infestations: Pitaya plants can be susceptible to pests such as mealybugs and scale. Inspect your plants regularly for pests and take appropriate action to control them.
Conclusion
Fazendo mudas de pitaya is a rewarding and cost-effective way to expand your dragon fruit collection. By following the steps outlined in this guide, you can successfully propagate pitaya plants from cuttings and enjoy the delicious and exotic fruit they produce. Remember to choose healthy cuttings, prepare them properly, provide the right rooting medium and care, and monitor for any issues. With patience and attention to detail, you’ll be well on your way to enjoying a bountiful harvest of dragon fruit. The key to successfully fazendo mudas de pitaya lies in understanding the plant’s needs and providing the optimal conditions for growth. Happy propagating!
[See also: Harvesting and Storing Dragon Fruit]
