How to Get Rid of Sealant: A Comprehensive Guide
Sealant, while incredibly useful for protecting surfaces and preventing leaks, can sometimes end up where it shouldn’t be. Whether it’s dried caulk on your bathroom tiles, stubborn adhesive residue on your car’s paint, or accidental spills on your workbench, knowing how to get rid of sealant effectively and safely is a valuable skill. This comprehensive guide provides a detailed, step-by-step approach to removing various types of sealants from different surfaces, ensuring you can restore your items to their original condition without causing damage. Understanding the type of sealant you’re dealing with and the surface it’s adhered to is crucial for selecting the right removal method. Incorrect techniques can lead to scratches, discoloration, or even structural damage. Therefore, careful planning and execution are key.
Understanding Different Types of Sealants
Before attempting to remove any sealant, it’s essential to identify the type of sealant you’re dealing with. Common types include:
- Silicone Sealant: Known for its flexibility and water resistance, often used in bathrooms and kitchens.
- Acrylic Sealant: Paintable and generally easier to remove than silicone, commonly used for filling gaps and cracks.
- Polyurethane Sealant: Durable and resistant to chemicals, often used in construction and automotive applications.
- Construction Adhesive: Extremely strong and designed for permanent bonding, making it one of the most challenging to remove.
Identifying the sealant type will inform your choice of removal methods and solvents.
Essential Tools and Materials
Having the right tools and materials on hand will make the sealant removal process significantly easier and more efficient. Here’s a list of essential items:
- Plastic Scraper: For gently lifting and scraping away sealant without scratching the surface.
- Putty Knife: For more aggressive scraping, but use with caution on delicate surfaces.
- Razor Blade Scraper: For precise removal of thin layers of sealant, but requires a steady hand to avoid damage.
- Heat Gun or Hair Dryer: To soften the sealant for easier removal.
- Solvents: Including mineral spirits, acetone, isopropyl alcohol, and specialized sealant removers.
- Clean Rags: For wiping away residue and cleaning the surface.
- Protective Gloves: To protect your skin from solvents and sealants.
- Safety Glasses: To protect your eyes from splashes and debris.
- Ventilation: Ensure adequate ventilation when working with solvents.
Step-by-Step Guide: How to Get Rid of Sealant
Step 1: Preparation
Before starting, protect the surrounding area with drop cloths or masking tape. This will prevent accidental damage from solvents or scraping. Ensure you have good ventilation, especially when working with solvents. Wear protective gloves and safety glasses.
Step 2: Softening the Sealant
Apply heat to the sealant using a heat gun or hair dryer. Hold the heat source a few inches away from the sealant and move it back and forth to avoid overheating. The heat will soften the sealant, making it easier to scrape away. For thicker sealants, you may need to apply heat for a longer period.
Step 3: Scraping Away the Sealant
Using a plastic scraper or putty knife, gently begin scraping away the softened sealant. Work at a shallow angle to avoid gouging the surface. If the sealant is particularly stubborn, reapply heat as needed. For delicate surfaces, use a plastic scraper and avoid excessive force.
Step 4: Applying Solvents
Once you’ve removed as much sealant as possible with a scraper, apply a solvent to dissolve any remaining residue. Choose the appropriate solvent based on the type of sealant. For silicone sealant, mineral spirits or specialized silicone removers work well. For acrylic sealant, isopropyl alcohol or acetone may be effective. Apply the solvent to a clean rag and gently rub the affected area. Allow the solvent to dwell for a few minutes to soften the residue.
Step 5: Removing Residue
After the solvent has had time to work, use a clean rag to wipe away the softened residue. You may need to repeat the solvent application and wiping process several times to completely remove the residue. For stubborn residue, use a plastic scraper or razor blade scraper to gently lift it away.
Step 6: Cleaning the Surface
Once all the sealant and residue have been removed, clean the surface with a mild detergent and water. This will remove any remaining solvent and leave the surface clean and ready for further treatment. Rinse the surface thoroughly and allow it to dry completely.
Specific Sealant Removal Techniques
Removing Silicone Sealant
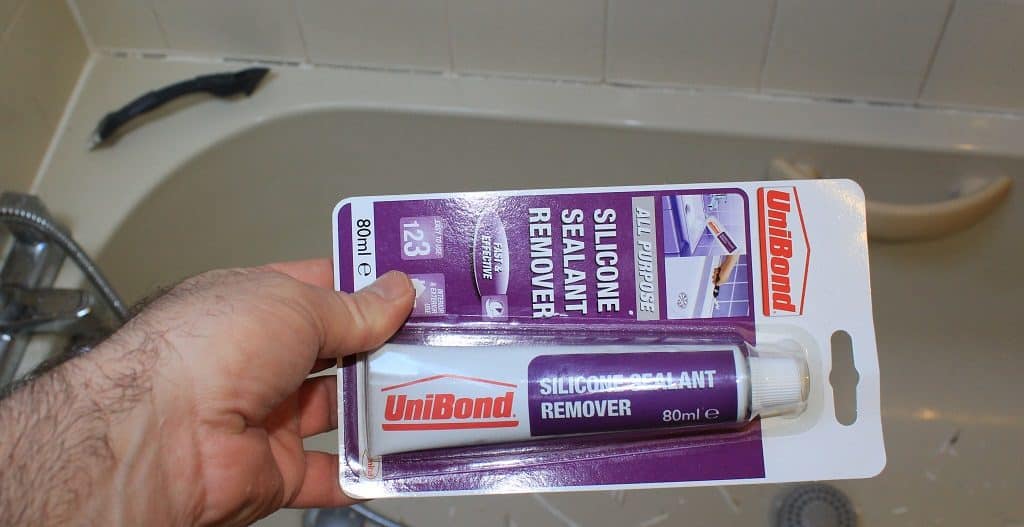
Silicone sealant can be particularly challenging to remove due to its flexibility and strong adhesion. In addition to the general steps outlined above, consider using a specialized silicone sealant remover. These products contain chemicals that specifically break down the silicone polymer, making it easier to scrape away. Apply the remover according to the manufacturer’s instructions and allow it to dwell for the recommended time before scraping.
Removing Acrylic Sealant
Acrylic sealant is generally easier to remove than silicone. Heat, scraping, and solvents like isopropyl alcohol or acetone are often sufficient. For painted surfaces, test the solvent in an inconspicuous area first to ensure it doesn’t damage the paint.
Removing Polyurethane Sealant
Polyurethane sealant is durable and resistant to many solvents, making it more difficult to remove. Stronger solvents like xylene or toluene may be necessary. However, these solvents are highly flammable and should be used with extreme caution in a well-ventilated area. Consider consulting a professional for polyurethane sealant removal, especially on delicate surfaces.
Removing Construction Adhesive
Construction adhesive is designed for permanent bonding and is notoriously difficult to remove. Heat, scraping, and strong solvents may be necessary, but success is not guaranteed. Specialized construction adhesive removers are available, but they may not be effective on all types of adhesive. In some cases, it may be necessary to cut away the affected area and replace it.
Tips and Tricks for Easier Sealant Removal
- Work in Sections: Tackle the sealant removal process in small sections to maintain control and avoid overwhelming yourself.
- Patience is Key: Don’t rush the process. Applying heat and solvents and allowing them to dwell will make the sealant easier to remove.
- Use the Right Tools: Choose the appropriate scraper and solvent for the type of sealant and the surface you’re working on.
- Test Solvents: Before applying a solvent to a large area, test it in an inconspicuous area to ensure it doesn’t damage the surface.
- Consider Professional Help: If you’re struggling to remove sealant or are concerned about damaging the surface, consider hiring a professional.
Safety Precautions
When working with sealants and solvents, it’s essential to take the following safety precautions:
- Ventilation: Ensure adequate ventilation to avoid inhaling harmful fumes.
- Protective Gear: Wear protective gloves and safety glasses to protect your skin and eyes.
- Flammable Materials: Keep flammable materials away from heat sources and solvents.
- First Aid: Have a first aid kit readily available in case of accidents.
- Read Instructions: Always read and follow the manufacturer’s instructions for sealants and solvents.
Preventing Sealant Problems in the Future
While knowing how to get rid of sealant is important, preventing sealant problems in the first place is even better. Here are some tips for preventing sealant issues:
- Use the Right Sealant: Choose the appropriate sealant for the application.
- Apply Sealant Carefully: Apply sealant evenly and avoid over-application.
- Clean Surfaces: Ensure surfaces are clean and dry before applying sealant.
- Regular Maintenance: Inspect sealant regularly and replace it as needed.
Conclusion
Removing sealant can be a challenging task, but with the right tools, techniques, and patience, it’s entirely achievable. By understanding the type of sealant you’re dealing with and following the steps outlined in this guide, you can effectively get rid of sealant from various surfaces without causing damage. Remember to prioritize safety and take the necessary precautions when working with solvents. With a little effort, you can restore your surfaces to their original condition and prevent future sealant problems. Whether it’s a minor spill or a major sealant overhaul, this guide provides the knowledge and tools you need to tackle the job with confidence. Remember to always test solvents in an inconspicuous area first and to seek professional help when needed. By following these guidelines, you can ensure a successful and safe sealant removal process.
[See also: How to Choose the Right Sealant for Your Project]
[See also: DIY Home Repair Tips and Tricks]
[See also: The Ultimate Guide to Caulking]
