How to Unscrew a Bike Pedal: A Comprehensive Guide
Removing or replacing bike pedals might seem daunting, but with the right tools and techniques, it’s a straightforward process. This guide provides a step-by-step approach on how to unscrew a bike pedal safely and efficiently. Whether you’re upgrading to clipless pedals, performing maintenance, or simply replacing worn-out pedals, understanding the proper procedure is crucial to avoid damaging your bike’s crank arms or injuring yourself.
Understanding Bike Pedal Threads
Before diving into the removal process, it’s essential to understand the threading of bike pedals. Unlike most screws and bolts, bike pedals have reverse threading. This means the left pedal tightens in a counter-clockwise direction and loosens in a clockwise direction. The right pedal, on the other hand, follows the standard threading – tightening clockwise and loosening counter-clockwise. This design prevents the pedals from unscrewing while riding.
Failing to recognize this difference can lead to frustration and potential damage. Remember: the direction you turn to loosen a pedal depends on which side of the bike you’re working on. Trying to force a pedal in the wrong direction can strip the threads, requiring expensive repairs or even a new crankset.
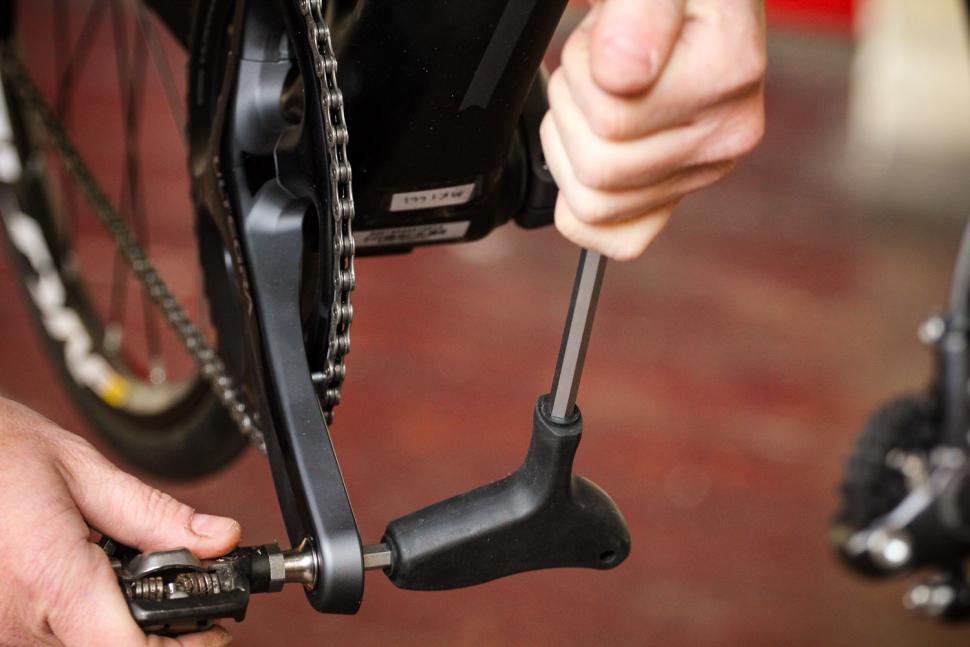
Tools You’ll Need
- Pedal Wrench (15mm): A specific wrench designed for bike pedals. It’s thinner than a standard wrench to fit between the pedal and crank arm.
- Allen Wrench (Typically 6mm or 8mm): Some pedals have an Allen key slot on the end of the pedal axle.
- Gloves: To protect your hands and improve grip.
- Penetrating Oil (Optional): If the pedal is stuck, penetrating oil can help loosen it.
- Rag or Cloth: To clean the pedal and crank arm threads.
Step-by-Step Guide to Unscrewing Bike Pedals
Preparation
Before you start, make sure your bike is stable. A bike repair stand is ideal, but leaning the bike against a wall or having someone hold it steady will also work. Locate the correct size wrench (either the pedal wrench or Allen wrench) for your pedals.
Applying Penetrating Oil (If Necessary)
If your pedals are particularly stubborn, apply a small amount of penetrating oil to the pedal threads where they meet the crank arm. Let the oil sit for about 10-15 minutes to allow it to work its way into the threads. This can significantly ease the removal process. Avoid using excessive amounts of oil, as it can attract dirt and grime.
Removing the Right Pedal
The right pedal (drive side) has standard threading. Position the wrench so that you can push down on it towards the rear of the bike. This provides leverage and prevents you from accidentally tightening the pedal. Push firmly and steadily. It may require some force to break the initial tightness. Remember, you’re turning the wrench counter-clockwise to loosen the right pedal. If using an Allen wrench, insert it into the end of the pedal axle and turn counter-clockwise.
Removing the Left Pedal
The left pedal (non-drive side) has reverse threading. This is where many people make mistakes. Position the wrench so that you can push down on it towards the front of the bike. This provides leverage for loosening. Push firmly and steadily. You’re turning the wrench clockwise to loosen the left pedal. If using an Allen wrench, insert it into the end of the pedal axle and turn clockwise.
Dealing with Stubborn Pedals
Sometimes, pedals are incredibly difficult to remove due to corrosion or over-tightening. Here are some tips for dealing with stubborn pedals:
- Increase Leverage: Use a longer wrench or slide a pipe over the end of your wrench to increase leverage. Be careful not to overdo it, as you could damage the wrench or crank arm.
- Heat: Applying heat to the crank arm around the pedal threads can help loosen the connection. Use a heat gun or hair dryer, being careful not to damage the paint or other components.
- Tap the Wrench: Gently tapping the wrench with a hammer can help break the bond between the pedal and crank arm.
- Professional Help: If you’ve tried everything and the pedal still won’t budge, it’s best to take your bike to a professional bike mechanic. They have specialized tools and experience in dealing with stubborn pedals.
Cleaning and Inspection
Once you’ve removed the pedals, clean the threads on both the pedals and the crank arms with a rag or cloth. Inspect the threads for any damage, such as stripped or cross-threaded areas. If the threads are damaged, you may need to have them re-tapped by a professional or replace the crank arms or pedals. [See also: Crank Arm Replacement Guide]
Lubricating the Threads
Before reinstalling the pedals, apply a small amount of grease to the pedal threads. This will prevent corrosion and make it easier to remove the pedals in the future. Use a grease specifically designed for bicycle components.
Reinstalling the Pedals
Reinstalling the pedals is essentially the reverse of the removal process. Remember to tighten the right pedal clockwise and the left pedal counter-clockwise. Tighten the pedals firmly, but don’t over-tighten them. A torque wrench can be helpful to ensure you’re tightening to the correct specification (typically around 30-40 Nm). [See also: Understanding Torque Wrenches for Bikes]
Common Mistakes to Avoid
- Forgetting the Threading Difference: This is the most common mistake. Always remember that the left pedal has reverse threading.
- Using the Wrong Tools: Using a standard wrench instead of a pedal wrench can damage the crank arm.
- Applying Excessive Force: Forcing a pedal can strip the threads. If a pedal is stuck, try using penetrating oil or heat before applying more force.
- Over-Tightening: Over-tightening the pedals can make them difficult to remove in the future and can damage the threads.
Maintenance Tips for Bike Pedals
Regular maintenance can extend the life of your bike pedals and prevent problems. Here are some tips:
- Clean Regularly: Clean your pedals regularly with a brush and degreaser to remove dirt and grime.
- Lubricate Regularly: Apply a small amount of lubricant to the pedal bearings periodically.
- Check for Play: Check for play in the pedal bearings. If the pedals feel loose or wobbly, they may need to be serviced or replaced.
- Grease Threads: Always grease the pedal threads before reinstalling them.
Conclusion
Knowing how to unscrew a bike pedal is a valuable skill for any cyclist. By understanding the threading, using the correct tools, and following the steps outlined in this guide, you can safely and efficiently remove and replace your bike pedals. Remember to take your time, be patient, and don’t be afraid to seek professional help if needed. Regular maintenance and proper technique will ensure that your pedals stay in good condition and provide years of reliable performance. Understanding the nuances of bike maintenance, like how to unscrew a bike pedal, empowers you to keep your ride smooth and enjoyable. Whether you are replacing worn-out components or upgrading for enhanced performance, mastering this skill is a cornerstone of bicycle upkeep. The ability to unscrew a bike pedal confidently saves time and money, fostering a deeper connection with your bicycle and its mechanical intricacies. Knowing how to unscrew a bike pedal is not just about maintenance; it’s about understanding your bike. Properly knowing how to unscrew a bike pedal ensures the longevity and performance of your bike.
