
Mastering Pitaya Propagation: A Comprehensive Guide to Making Pitaya Cuttings
Pitaya, also known as dragon fruit, is a vibrant and exotic fruit gaining popularity worldwide. Cultivating your own pitaya plants can be a rewarding experience, and one of the most effective methods for expanding your pitaya orchard is through propagation by cuttings. This comprehensive guide will walk you through the entire process of fazendo mudas de pitaya, ensuring you have the knowledge and skills to successfully propagate these fascinating fruits.
Understanding Pitaya Propagation
Fazendo mudas de pitaya, or making pitaya cuttings, is a relatively straightforward process that allows you to create new plants that are genetically identical to the parent plant. This method is preferred by many growers because it’s faster and more reliable than starting from seeds. Seed propagation can result in variations in fruit quality and plant characteristics, whereas cuttings ensure consistency.
Why Choose Cuttings?
- Faster Fruiting: Plants grown from cuttings typically fruit much sooner than those grown from seeds. You can expect to see fruit within 1-2 years, compared to 3-5 years for seed-grown plants.
- Genetic Consistency: Cuttings produce plants that are genetically identical to the parent plant, ensuring consistent fruit quality and plant characteristics.
- Cost-Effective: Propagation by cuttings is a relatively inexpensive way to expand your pitaya collection.
- High Success Rate: With proper care and attention, cuttings have a high success rate of rooting and developing into healthy plants.
Selecting the Right Pitaya Cutting
The success of fazendo mudas de pitaya largely depends on selecting healthy and mature cuttings. Here’s what to look for:
Characteristics of a Good Cutting
- Maturity: Choose cuttings from mature stems that are at least 1-2 years old. These stems will be thicker and more likely to root successfully.
- Health: Select cuttings from healthy plants that are free from disease and pests. Avoid stems with discoloration, soft spots, or signs of damage.
- Length: Cuttings should be between 12-24 inches (30-60 cm) long. Longer cuttings have more stored energy and are more likely to root successfully.
- Nodes: Ensure the cutting has several nodes (the points where leaves or spines emerge). These nodes are where roots will develop.
Preparing the Pitaya Cutting
Proper preparation is crucial for successful rooting. Follow these steps to prepare your pitaya cuttings:
Step-by-Step Preparation
- Sanitize Your Tools: Before you begin, sanitize your pruning shears or knife with rubbing alcohol to prevent the spread of disease.
- Make the Cut: Make a clean, angled cut at the base of the stem. This will help the cutting root more easily.
- Callousing: Allow the cut end of the cutting to callous over for 1-2 weeks. This helps prevent rot and encourages root development. Place the cuttings in a dry, shaded area with good air circulation.
- Optional Rooting Hormone: Dip the calloused end of the cutting in rooting hormone powder or liquid to further stimulate root growth. This step is optional but can increase your success rate.
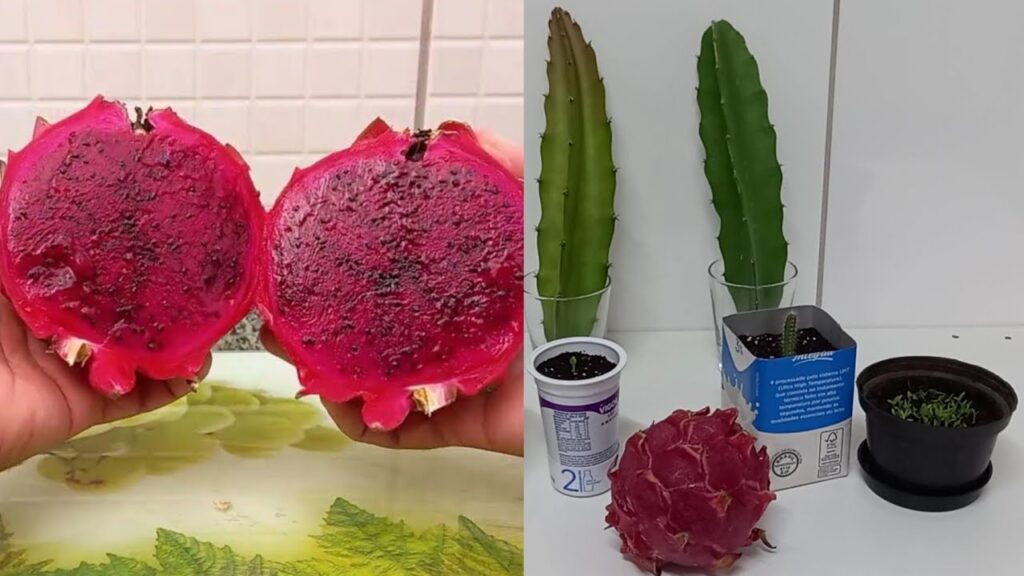
Planting the Pitaya Cutting
Once the cutting has calloused, it’s time to plant it. Choose a well-draining potting mix and a suitable container.
Choosing the Right Potting Mix and Container
- Potting Mix: Use a well-draining potting mix specifically formulated for cacti and succulents. This type of mix typically contains a blend of perlite, sand, and peat moss to provide adequate drainage and aeration.
- Container: Choose a pot that is at least 6 inches (15 cm) in diameter and has drainage holes. The container should be large enough to accommodate the developing root system.
Planting Instructions
- Fill the Pot: Fill the pot with the potting mix, leaving about an inch of space at the top.
- Plant the Cutting: Insert the calloused end of the cutting into the potting mix, burying it about 2-3 inches (5-8 cm) deep.
- Water Gently: Water the cutting gently to moisten the potting mix. Avoid overwatering, as this can lead to rot.
- Provide Support: Pitaya plants are climbing cacti, so they will need support as they grow. Insert a stake or trellis into the pot to provide support for the cutting.
Caring for Your Pitaya Cutting
Proper care is essential for the successful rooting and growth of your pitaya cutting. Here are some key factors to consider:
Light, Water, and Temperature
- Light: Place the cutting in a location that receives bright, indirect sunlight. Avoid direct sunlight, which can scorch the cutting.
- Water: Water the cutting sparingly, allowing the potting mix to dry out completely between waterings. Overwatering is a common cause of root rot.
- Temperature: Pitaya plants thrive in warm temperatures between 65-80°F (18-27°C). Protect the cutting from frost and freezing temperatures.
Monitoring and Maintenance
- Check for Rooting: After a few weeks, gently tug on the cutting to check for root development. If the cutting resists being pulled out, it has likely rooted.
- Fertilizing: Once the cutting has rooted, you can begin fertilizing it with a balanced fertilizer diluted to half strength. Fertilize every 2-4 weeks during the growing season.
- Pest and Disease Control: Monitor the cutting for signs of pests or diseases. Treat any infestations or infections promptly with appropriate measures.
Troubleshooting Common Issues
Even with the best care, you may encounter some challenges when fazendo mudas de pitaya. Here are some common issues and how to address them:
Common Problems and Solutions
- Root Rot: Root rot is a common problem caused by overwatering. To prevent root rot, ensure the potting mix is well-draining and avoid overwatering. If root rot occurs, remove the affected cutting from the pot, trim away any rotted roots, and replant it in fresh potting mix.
- Lack of Rooting: If the cutting fails to root after several weeks, it may be due to poor cutting selection, improper preparation, or unfavorable environmental conditions. Ensure you are using healthy, mature cuttings, preparing them properly, and providing them with adequate light, water, and temperature.
- Pest Infestations: Common pests that can affect pitaya plants include aphids, mealybugs, and spider mites. Treat infestations promptly with insecticidal soap or neem oil.
Transplanting Your Pitaya Plant
Once your pitaya plant has outgrown its initial container, it’s time to transplant it to a larger pot or into the ground. Here’s how to do it:
Transplanting Guidelines
- Choose the Right Time: Transplant your pitaya plant during the spring or summer months when it is actively growing.
- Select a Suitable Location: If transplanting into the ground, choose a location that receives full sun and has well-draining soil.
- Prepare the New Pot or Planting Hole: If transplanting to a larger pot, fill it with well-draining potting mix. If transplanting into the ground, dig a hole that is twice as wide and as deep as the root ball.
- Carefully Remove the Plant: Gently remove the pitaya plant from its current container, being careful not to damage the roots.
- Plant the Pitaya: Place the pitaya plant in the new pot or planting hole, ensuring that the top of the root ball is level with the surrounding soil.
- Water Thoroughly: Water the transplanted pitaya plant thoroughly to help it settle in.
Fazendo mudas de pitaya is a rewarding process that allows you to expand your collection of these exotic fruits. By following these steps and providing your cuttings with proper care, you can successfully propagate pitaya plants and enjoy the delicious fruits of your labor. Remember to select healthy cuttings, prepare them properly, and provide them with the right environmental conditions. With patience and attention, you’ll be harvesting your own dragon fruit in no time! [See also: Growing Pitaya in Cold Climates] [See also: Best Soil for Pitaya Plants] [See also: Pitaya Pest and Disease Management]
The key to successfully fazendo mudas de pitaya lies in understanding the plant’s needs and providing the appropriate care. From selecting the right cuttings to ensuring proper drainage and sunlight, each step plays a crucial role in the plant’s development. Don’t be discouraged by initial setbacks; with practice and persistence, you’ll become a proficient pitaya propagator. Embrace the journey of fazendo mudas de pitaya, and enjoy the satisfaction of nurturing these unique and delicious fruits from cutting to harvest. Making pitaya cuttings is a fulfilling task.
When fazendo mudas de pitaya, remember to always prioritize hygiene to prevent diseases. Clean tools and a sterile environment are key. Also, keep in mind the importance of the callousing period. This simple step can significantly improve your success rate when fazendo mudas de pitaya. The callousing process is vital for preventing rot.
In conclusion, fazendo mudas de pitaya is an accessible and effective method for expanding your pitaya orchard. With the knowledge and techniques outlined in this guide, you can confidently embark on your pitaya propagation journey and enjoy the fruits of your labor for years to come. Happy growing! The process of fazendo mudas de pitaya provides a sustainable way to increase your yield. Remember that consistent moisture control is crucial when fazendo mudas de pitaya.
